
What the Content Marketing Planner does
Nexaly Planner’s Content Marketing Planner is a browser-local workspace for organizing the content that supports a fashion or ecommerce launch. It brings posts, products, drops, social-sale attribution, email, user-generated content (UGC), shoots, live shopping, SMS, bio links, ideas, key dates, and marketing research into one interface. It is designed for planning and record keeping, not for publishing automatically to social networks or sending messages to customers.
The first screen is intentionally password-gated. On a new workspace, you can choose Set password & open or Skip for now. After you enter the planner, the verified interface includes a Command Center, Content Hub, Calendar, Idea Bank, product and campaign records, supporting creation tools, audience tools, Settings, and a lock control. The product stores its workspace in the current browser. It does not provide verified cloud synchronization, team sharing, social-platform publishing, email delivery, SMS delivery, payment processing, or automatic external actions.
For a US fashion brand, the practical use case is a repeatable workflow: register the products in a collection, define a drop, turn ideas into dated posts, attach posts to products and campaigns, prepare email and SMS plans, brief UGC and shoots, then enter results after publishing. The planner can calculate local engagement and attributed-sales views from the numbers you enter. It cannot verify those numbers against Instagram, TikTok, Pinterest, Facebook, YouTube, an ecommerce platform, or an email provider.
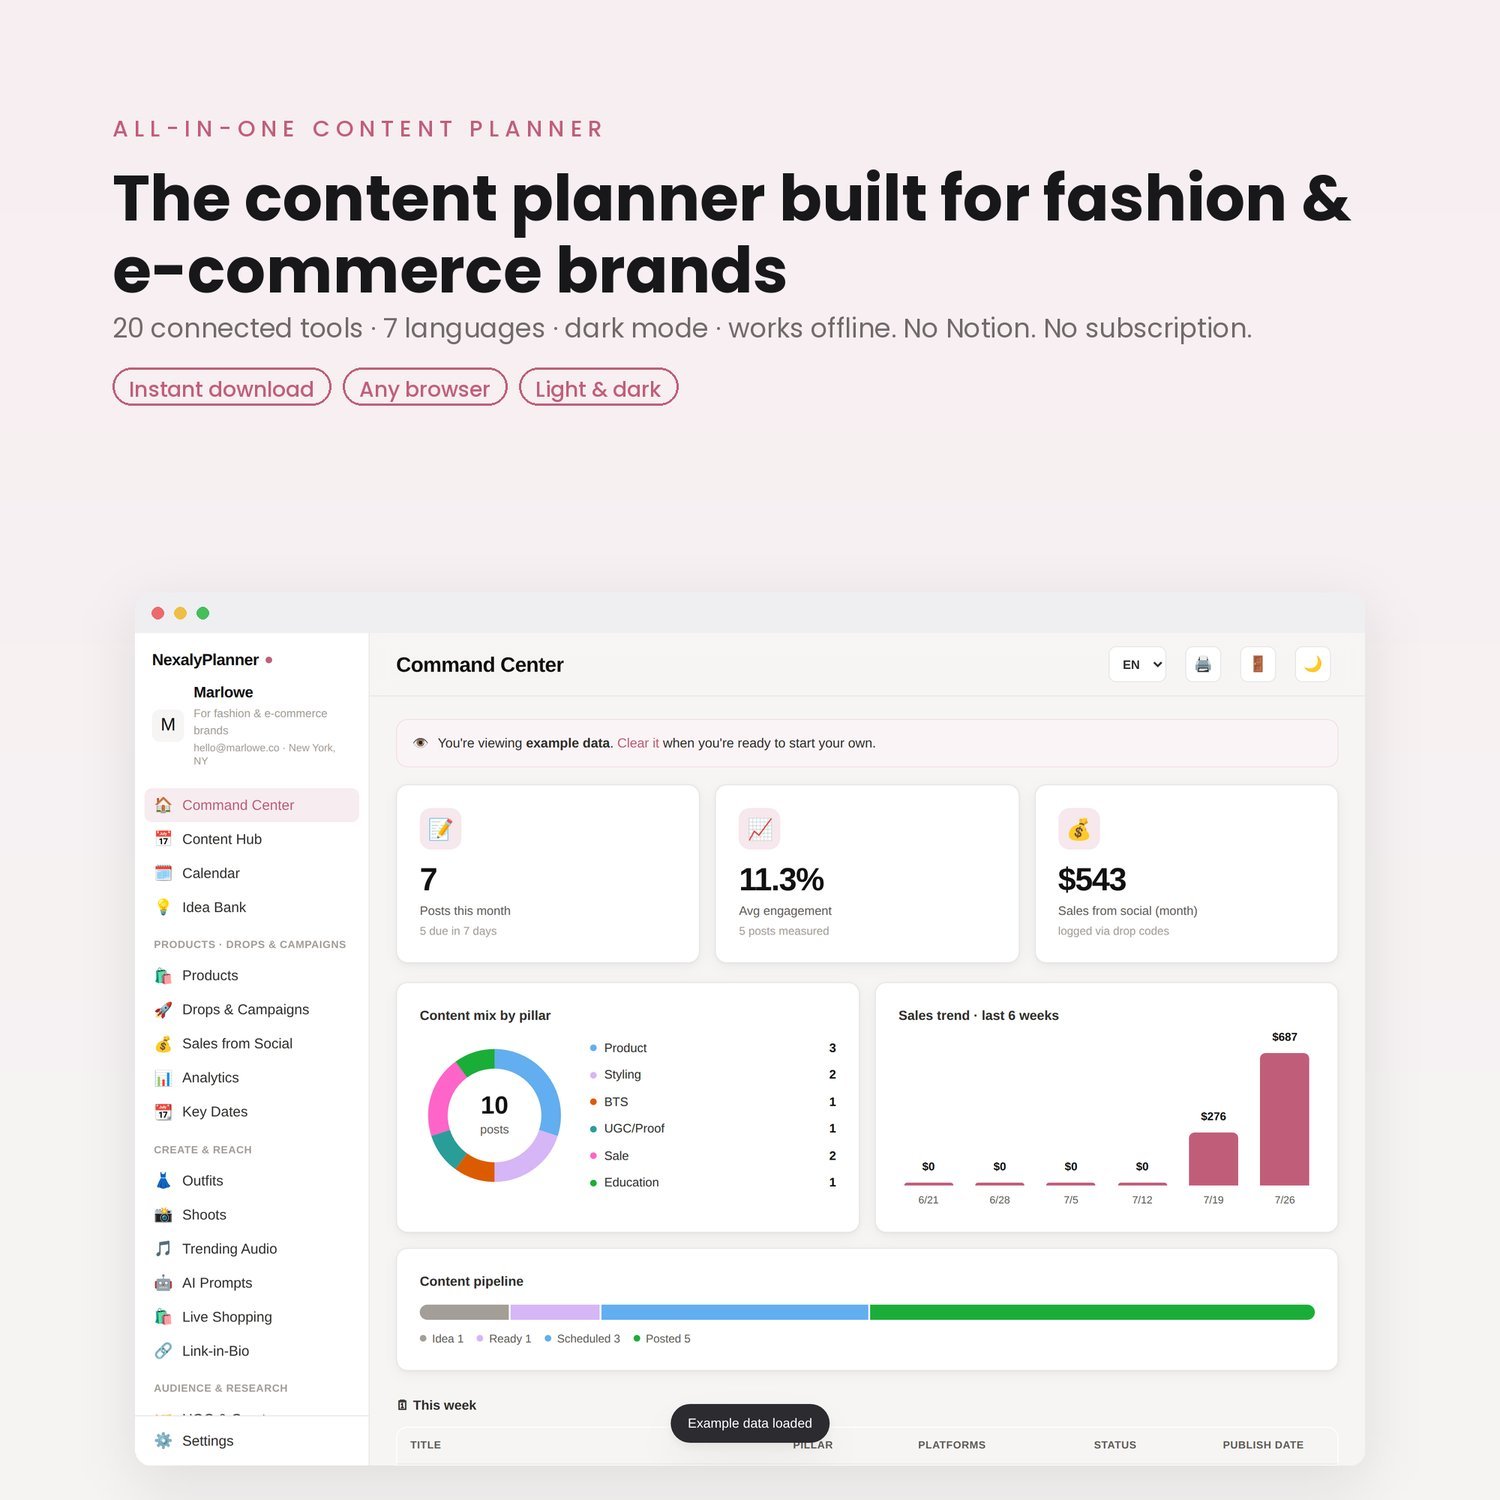
Figure 1. The audited baseline opens on the initial password setup screen. Choose a local password or skip protection before using the post-unlock planning workspace.
Quick start: your first 20 minutes
- Decide whether to protect the workspace. Enter at least three characters in Choose a password, then select Set password & open. If you are only evaluating the planner, choose Skip for now and add a password later in Settings.
- Open Settings. Enter your Brand name, optional Contact number and Address, and a logo emoji or image. Select the currency you use for planning; US brands will normally choose USD.
- Create one product. In Products, select Add product and enter its title, collection, category, price, status, and optional Shoppable link.
- Create one campaign. In Drops & Campaigns, select Add drop. Add the drop name, type, status, start and end dates, goal, and discount code if applicable.
- Add a post. In Content Hub, select Add post. Choose a status, publish date, platform, format, pillar, hook, caption, hashtags, call to action, and shoppable setting. Link the post to the product and campaign when those records exist.
- Review the Calendar. Confirm that the post appears on its publish date. Use Today, the previous/next month controls, and the calendar event itself to inspect or edit the record.
- Record results after publishing. Reopen the post and enter Likes, Comments, Saves, Shares, Reach, and Sales attributed. These are manual inputs.
- Export a backup. In Settings > Your data, select Export backup and store the downloaded
planner-backup.jsonsomewhere separate from the browser and computer.
Complete menu and screen map
The sidebar uses the following verified labels in English. The exact wording changes when another language is selected, but the underlying screens remain the same.
| Sidebar group | Screen | What it is for |
|---|---|---|
| Main planning | Command Center | Review this week’s posts, upcoming drops, monthly post count, average engagement, and social-attributed sales. |
| Main planning | Content Hub | Create, edit, delete, and organize individual content posts. |
| Main planning | Calendar | View dated posts in a month grid and open them for editing. |
| Main planning | Idea Bank | Save content ideas under a content pillar and convert an idea into a Content Hub post. |
| Products and campaigns | Products | Store collection, category, price, status, and shoppable-link records. |
| Products and campaigns | Drops & Campaigns | Plan launches, sales, UGC activations, and live events with dates, goals, codes, and a checklist. |
| Products and campaigns | Sales from Social | Review manually attributed sales by source record. |
| Products and campaigns | Analytics | Review locally calculated content mix, engagement by pillar, posts by platform, and top posts. |
| Products and campaigns | Key Dates | Keep sale, awareness, brand, and cultural dates alongside the content plan. |
| Create & Reach | Outfits | Assemble products into outfit concepts with an occasion or season and notes. |
| Create & Reach | Shoots | Plan model, flat-lay, lifestyle, or video shoots with products, location, shot list, and asset link. |
| Create & Reach | Trending Audio | Track sounds by platform, status, link, and notes. |
| Create & Reach | AI Prompts | Copy prompt templates for captions, hooks, content ideas, hashtags, and search-engine optimization (SEO), or save your own prompts. |
| Create & Reach | Live Shopping | Plan a live event with platform, status, date, discount code, products, and run of show. |
| Create & Reach | Link-in-Bio | Maintain a local list and preview of active bio links. |
| Audience & Research | UGC & Creators | Track creator handles, briefs, deliverables, usage rights, rights expiry, and content links. |
| Audience & Research | Email & Marketing | Plan newsletters, campaigns, segments, preview text, body notes, dates, and attributed sales. |
| Audience & Research | SMS Broadcasts | Draft up to 320 characters, choose a segment and date, assign a status, and record attributed sales. |
| Audience & Research | Competitor Radar | Track competitors, trends, hashtags, audio, and formats with a link and notes. |
| Footer | Settings | Configure brand identity, logo, accent, language, currency, password lock, data export/import, print, examples, and reset. |
| Footer | Lock | End the current unlocked session and return to the password screen when a password is set. |
The top bar also includes a language selector, a print button, a lock/logout button, a theme toggle, and a context-sensitive primary add button such as Add post, Add product, or Add drop. On smaller screens, the sidebar is opened with the menu button.
Setup, local protection, and personalization
Set or skip the initial password
On first launch, the setup screen says, “Protect your planner with a password. You can skip and add one later.” To protect the workspace, enter a password in Choose a password and select Set password & open. The source requires at least three characters. If the value is shorter, the screen reports Use at least 3 characters.
Selecting Skip for now opens the planner without a password. This is an intentional onboarding path, not evidence that the product is missing a login. Add protection later through Settings > Password lock > Set password. When a password exists, the initial unlock screen shows the brand, the product name, a Password field, and an Unlock button. An incorrect entry produces Wrong password.
The lock is local browser protection. It is not a user account, an identity system, or a cloud authentication service. The product does not verify an email address or provide a password-reset service. Keep a separate copy of important records and do not treat the lock as a substitute for operating-system security or a secure password manager.
Configure the brand
Open Settings and complete the Brand card. Enter Brand name so the sidebar and printed plan identify the correct business. Add an optional Contact number and Address if they should appear in the workspace and print output. You can use a short Logo (emoji) or upload a Logo image. The file is stored as part of the browser-local workspace.
Choose an Accent colour from the preset swatches or use the color picker. The product includes a light/dark theme toggle in the top bar. Theme choice changes the interface display; it does not alter content records.
Choose language and currency
The verified language selector includes English, Español, Français, Deutsch, Italiano, Português, and العربية. The top-bar selector uses short labels, while Settings shows the full language names. Arabic switches the document direction to right-to-left.
Settings also provides Tier 1 and Tier 2 currency groups. USD is the appropriate starting choice for most US fashion and ecommerce brands. Currency changes the displayed symbol for product prices and attributed-sales fields. It does not convert an existing value or import a live exchange rate. If a product was entered as 78 while USD was selected, changing the setting to CAD does not prove that the product is now worth C$78 in market terms. Review and update values yourself when changing currency.
Core content-planning workflow
1. Capture ideas before assigning dates
Open Idea Bank and select Add idea. Enter the Idea text and choose one of the verified pillars: Product, Styling, BTS, UGC/Proof, Sale, or Education. Saving an idea creates a local record with the default Medium priority and Backlog status.
When an idea is ready, use its conversion action to add it to the Content Hub. The planner carries over the idea text and pillar, gives the new post an Idea status, uses Reel/Short as the initial format, and uses Shop now as the initial call to action. It does not automatically write a caption, choose a platform, select a date, or publish the post. Complete those fields in the post modal.
2. Create a complete post record
Select Add post from the Content Hub, Calendar, or the top bar. Use the following procedure.
- Enter a clear Title, such as “Three ways to style the Harbor Linen Set.”
- Choose a Status. The source defines the available post statuses; use the status that matches your internal workflow rather than assuming that it will publish anything externally.
- Enter the Publish date using the date control.
- Select one or more Platforms from Instagram, TikTok, Pinterest, Facebook, and YouTube.
- Choose a Format: Reel/Short, Carousel, Static, Story, Live, or UGC.
- Select a Pillar such as Product, Styling, BTS, UGC/Proof, Sale, or Education.
- Write the Hook (first line), then add the Caption and Hashtags / keywords.
- Select a Call to action, such as Shop now, and mark Shoppable when the content is intended to support a product path.
- If records exist, associate the post with a Product, Drops & Campaigns entry, and Outfit.
- After publishing, enter Likes, Comments, Saves, Shares, Reach, and Sales attributed. Select Save.
The planner calculates engagement from the entered interaction totals divided by Reach. It also uses attributed values attached to posts, email records, and SMS records when it totals campaign sales. These calculations are local summaries, not platform-certified reporting. Do not enter gross revenue as attributed social sales unless your own attribution rule supports that decision.
3. Organize a launch in Drops & Campaigns
Select Add drop in Drops & Campaigns. The screen supports these types: Drop, Sale, Launch, UGC, and Live. Set a status of Planning, Live, or Wrapped, then enter Start, End, Goal, and an optional Discount code.
A new drop receives a ready-made tease → launch → sustain checklist for social and email. Open a saved drop to review its phases and check individual tasks. Existing drop records expose the Launch checklist (social + email). Tick a task only after your team has completed it; the checkbox is a planning record, not proof that a social post, email, or discount code was actually deployed.
Posts, email records, and SMS records can be linked to a drop. The campaign total shown in the planner combines the attributed values you enter on those linked records. It does not fetch orders from Shopify, an ecommerce platform, a payment processor, or an ad account.
4. Use Calendar and Key Dates together
The Calendar is a month grid for posts. Use the previous and next controls to move between months or select Today to return to the current month. Each calendar event displays a shortened post title and can be opened for editing. A day shows up to three post events before a +N more indicator appears.
Use Key Dates for planning context that should not be confused with a post. Add a Moment, Date, Type, and Angle. The verified types are Sale, Awareness, Brand, and Cultural. For a US brand, examples include a Memorial Day promotion, a local store anniversary, a seasonal collection moment, or a cultural event that the brand has a legitimate reason to address. The record helps your team decide what to publish; it does not automatically create calendar posts.
Products and commerce context
Open Products and select Add product. Enter the product Title, Collection, Category, Price, and status. Available statuses are Planned, Live, Sold out, and Archived. Add a Shoppable link if you want the record to hold the relevant URL.
Product records are deliberately lightweight. They are not an inventory ledger, order system, tax system, or product-feed integration. Use the product record to give content and campaign records a consistent object to reference. Keep stock quantities, fulfillment, tax calculations, and official order totals in the system that actually manages those functions.
The Sales from Social screen presents the sales values you entered against posts and related sources. Treat the view as an attribution worksheet. Establish one rule, such as “count a sale only when the customer used the campaign code,” and apply it consistently. The planner does not independently validate the rule.
Supporting creation and audience features
Outfits
In Outfits, select Add outfit. Enter the outfit name, choose its Pieces from saved products, and add an Occasion / season and Notes. An outfit can then be associated with a post. This is useful for a styling carousel or “one piece, three looks” video, but the planner does not generate images or reserve inventory.
UGC & Creators
Select Add creator in UGC & Creators. Enter the creator Handle, Brief / angle, Deliverables, Usage rights, Rights expiry, and Content link. Use this screen to document what was agreed and when rights should be reviewed. It is not a contract system, legal review, or rights-enforcement service. Confirm permissions and commercial terms outside the planner.
Shoots
Select Add shoot in Shoots. Choose a shoot type—Model, Flat-lay, Lifestyle, or Video—and a status of Planned, Shot, Edited, or Filed. Add the date, model, location, products to shoot, Shot list, and Assets link. The record is a production brief. It does not upload files or confirm that a linked asset remains accessible.
Trending Audio and Competitor Radar
Trending Audio stores a sound name, platform, status, link, and note. Its statuses are To try, Used, and Expired. Use the record to capture why a sound fits the brand and when to stop considering it.
Competitor Radar stores a title or handle, type, status, link, and notes or angle. The types are Competitor, Trend, Hashtag, Audio, and Format. The statuses are Watching, Try this, and Done. The screen does not continuously monitor competitors or trends. A link opens an external page only when you choose it.
AI Prompts
AI Prompts contains copyable prompt templates grouped into Captions, Hooks, Content ideas, and Hashtags & SEO. For example, a template asks for captions for a [product] in a [tone] voice. Select Copy, replace the bracketed placeholders, and paste the prompt into your preferred AI tool. Select Add prompt to save your own reusable prompt.
This module is a prompt library, not a verified generative AI connection. Review any generated wording for factual accuracy, brand voice, claims, accessibility, copyright, and suitability for the intended audience before publication.
Live Shopping, Link-in-Bio, Email, and SMS
In Live Shopping, select Add live event. Add a title, platform, status (Planned, Live, or Done), date, discount code, products, and Run of show. The planner does not start a livestream or connect to a platform.
In Link-in-Bio, select Add link. Enter the link label, URL, and Active or Inactive status. The page provides a local bio preview from active links. Updating this list does not change the actual Instagram or TikTok bio.
In Email & Marketing, select Add email. Enter Subject, type (Newsletter or another available type), status, Send date, segment (All, VIP, New, or Lapsed), Preview text, Body, an associated drop, and Sales attributed. This is a campaign planning and measurement record. It does not send email.
In SMS Broadcasts, select Add SMS. The Message field is limited to 320 characters. Add the send date, segment, status (Idea, Ready, or Sent), attributed sales, and a drop if relevant. The status is manual and does not transmit a message.
Worked US example: a two-week linen-set launch
Assume Northline Studio, a US direct-to-consumer apparel brand, is launching the Harbor Linen Set. The planned price is $148, the campaign code is HARBOR10, and the brand wants to launch on Friday, April 23, 2027.
First, the owner opens Settings, enters “Northline Studio” as the Brand name, selects USD, chooses a muted navy accent, and exports a backup before entering campaign data. In Products, the owner creates “Harbor Linen Set,” enters “Spring 2027” as the collection, “Sets” as the category, 148 as the price, selects Planned, and adds the product URL.
Next, the owner opens Drops & Campaigns > Add drop and enters:
| Field | Example value |
|---|---|
| Title | Harbor Linen Set Launch |
| Type | Launch |
| Status | Planning |
| Start | 2027-04-12 |
| End | 2027-04-30 |
| Goal | Sell 75 sets in the launch window |
| Code | HARBOR10 |
The owner opens the generated launch checklist and uses its phases to schedule work. On April 12, they create a Content Hub post titled “The set that does the whole weekend,” with an April 15 publish date, Instagram and TikTok platforms, Reel/Short, the Styling pillar, a hook, caption, hashtags, Shop now, and Shoppable selected. They link the post to Harbor Linen Set and Harbor Linen Set Launch.
On April 19, they add a carousel post titled “Three ways to wear Harbor,” select Carousel, Product, Instagram and Pinterest, and link the same product and campaign. On April 23, they add the launch-day post with the Sale pillar and enter the code in the caption. In Email & Marketing, they create a newsletter for April 22 to the All segment and link it to the drop. In SMS Broadcasts, they create a 146-character launch reminder for April 23, set it to Ready, and link the drop.
The owner opens Outfits, creates “Harbor weekend uniform,” selects the linen shirt and shorts as pieces, and adds “Spring / travel” as the occasion. They attach the outfit to the April 15 styling post. They also create a Lifestyle shoot for April 8 at a Brooklyn studio, select the Harbor product, and enter a shot list: “full look, close fabric detail, seated movement, shirt layered open.”
After the launch, the owner does not assume that the planner knows the results. They reopen each post and enter the observed platform numbers. For the April 23 post, suppose Reach is 18,000, Likes are 720, Comments are 54, Saves are 180, and Shares are 96. The local engagement calculation is (720 + 54 + 180 + 96) / 18,000 × 100 = 5.83%. If the brand’s attribution rule identifies $1,184 in sales from that post, the owner enters 1184 in Sales attributed. They use the same rule for email and SMS rather than counting the entire launch total three times.
Finally, the owner reviews Command Center, Sales from Social, and Analytics, checks off completed campaign tasks, prints a plan if needed, and exports a fresh planner-backup.json. The resulting workspace is a useful local campaign record. It is not a substitute for the brand’s ecommerce order data, analytics platform, consent records, or legal agreements with creators.
A practical daily and weekly routine
Daily, 10 minutes
Start in Command Center and review the current week. Open the Calendar to confirm the next dated post. Check whether the linked product is still Live, whether the call to action and URL are current, and whether the related drop has the right status. After a post has meaningful results, update its metrics instead of relying on memory. If a trend or sound is relevant, record it in Trending Audio or Competitor Radar rather than leaving it in a chat thread.
Weekly, 45–60 minutes
At the start of the week, open Idea Bank and convert the strongest ideas into draft posts. Check that the content mix is not dominated by a single pillar. Review Key Dates for the next four to six weeks, then inspect every active drop’s launch checklist. Confirm that email, SMS, UGC, shoots, and live-shopping records are linked to the correct campaign.
At the end of the week, enter observed Reach and engagement values, document attributed sales according to the brand’s rule, and review Analytics. Print the current plan for a meeting if a paper or PDF copy is useful. Export a backup at least weekly and before a major device or browser change.
Backup, restore, and offline limitations
The application saves its state under a browser-local storage key and uses an in-memory fallback if browser storage cannot be written. In practical terms, the normal workspace is local to that browser profile and device. Clearing site data, using a different browser profile, private browsing, browser cleanup tools, or changing devices can make the local workspace unavailable.
Use Settings > Your data > Export backup to download planner-backup.json. The export is a JSON file, not a verified encrypted archive. Store it in a controlled location and consider the contents sensitive because it may include brand information, URLs, creator details, campaign notes, and the local password-lock state. Do not email it casually or place it in an unprotected shared folder.
To restore, open Settings > Your data, select Import backup, choose the JSON file, and wait for the imported workspace to render. The import replaces the current in-browser state with the parsed file. Keep a current export of the destination workspace before importing. If the file is malformed or is not the expected planner JSON, the product reports Invalid file. There is no verified merge workflow, version history, cloud restore, or automatic backup.
The planner’s local password lock should be understood as a convenience boundary around the browser workspace. It does not encrypt the JSON export, protect the file system, or provide account recovery. Anyone with access to the browser profile or an exported file may have additional ways to inspect data. Use device security and appropriate access controls for sensitive brand or creator information.
Advantages and limitations
Advantages
The planner gives a small fashion team one vocabulary for content, products, drops, creators, shoots, email, SMS, and social-attributed sales. Its local model can be useful when a team wants a private planning board without signing into multiple platforms. The post form is detailed enough to capture a hook, caption, platform, format, pillar, call to action, shoppable state, product, outfit, campaign, and post-publication metrics. The Calendar, drop checklist, print view, and JSON export support a practical weekly operating rhythm.
Limitations
The product is not a social scheduler, ecommerce platform, customer relationship management system, inventory system, email service, SMS provider, analytics connector, or payment ledger. It does not publish, send, buy, change external accounts, or verify third-party metrics. Attribution, checklist completion, creator rights, and status values depend on the user’s own records.
Storage is browser-local and backup is manual. There is no verified cloud sync, multi-user collaboration, conflict resolution, automatic backup, merge import, or password-recovery service. The AI Prompts module provides prompt text and copying; it does not establish a built-in AI connection. Treat every generated marketing claim as draft copy requiring human review.
Troubleshooting and common mistakes
The password screen keeps appearing. Use the password saved for this browser workspace. If you selected Skip for now, there is no password to enter; open the planner and set one from Settings. If the browser was cleared or the data was moved to a new device, restore a known JSON backup rather than assuming the old browser state is still available.
The planner opens but my records are missing. Check that you are using the same browser profile and that site data was not cleared. Confirm that you did not import an older JSON file or use Reset everything. Restore the latest verified backup if needed.
My campaign sales total is wrong. Review the Sales attributed values on linked posts, emails, and SMS records. The planner sums what you entered; it does not deduplicate orders or validate the attribution rule. Ensure the same sale was not entered on multiple sources.
A post is not showing where expected. Confirm that its Publish date uses the intended date and that the Calendar is on that month. The Calendar displays posts, not Key Dates, products, email, or SMS records.
My product price did not convert when I changed currency. Currency selection changes the display symbol and formatting. It does not perform an exchange-rate conversion. Re-enter values using the new currency only after confirming the intended amounts.
A link or creator asset is unavailable. The planner stores the URL you entered; it does not mirror the external page or file. Check the link in its source service and keep independent copies of important briefs or deliverables.
I expected a social platform or email integration. None is verified in the audited interface. Use the planner as a preparation and record-keeping layer, then execute the approved work in the relevant external service.
Frequently asked questions
Does Content Marketing Planner publish to Instagram or TikTok?
No verified feature publishes posts. The planner records the intended platform, format, copy, date, and results for manual execution and later review.
Can I use it without setting a password?
Yes. Select Skip for now on the initial screen. You can add a password later under Settings > Password lock.
Is the password a cloud account login?
No. It is a local browser-workspace lock. There is no verified account sign-in, email recovery, or cloud authentication.
Does the Calendar include campaigns and key dates?
The verified Calendar displays dated posts. Drops and Key Dates have their own screens and records. Use all three screens together when planning a launch.
Can I track sales from social?
Yes, as manual attribution. Enter a value in Sales attributed on supported post, email, or SMS records. The planner calculates local summaries from those entries; it does not verify orders.
Does the planner contain inventory or order management?
No. Products store content context such as collection, category, price, status, and a shoppable link. Use your ecommerce or inventory system for stock, fulfillment, taxes, and official order data.
Is the AI Prompts screen an AI assistant?
It is a copyable prompt library with saved personal prompts. It does not verify a built-in generative model or automatic content generation workflow.
How do I move the planner to another computer?
Export planner-backup.json from Settings, move the file securely, open the planner on the destination browser, and use Import backup. Confirm the restored data and retain the original backup until the move is complete.
Can multiple teammates edit the same workspace?
No verified collaboration or cloud synchronization is provided. A team can exchange exports, but that creates manual version-control and privacy risks.
Does print create a permanent backup?
Print creates a human-readable plan for printing or saving as PDF. It is not a full JSON data backup. Use Export backup for a restorable workspace copy.
Recommended next steps and internal links
Start with the Content Marketing Planner product page if you are evaluating the planner, then return to the Nexaly Planner guides hub for operating routines and product-specific documentation. Brands comparing tools may also want a guide to an offline inventory and procurement workflow, a small-business sales and profit dashboard, or an offline owner operating system for ecommerce.
Build a publishing schedule with the 30-day clothing brand content calendar and use the boutique social post ideas for practical hooks and calls to action. Return to the Content Marketing Planner product page to see its workflow.
CTA
Ready to build a calmer launch process? Use the Content Marketing Planner for your next collection or campaign, set up the product and drop first, and export a backup before the campaign becomes your team’s source of truth.
Explore Content Marketing Planner
Review product screenshots, included features, download details and current purchase terms.
View Content Marketing PlannerPlan a source and review an asset with free worksheets
Use the free Content Repurposing Planner to map editable tasks from a source you can adapt. Use the Content Publishing Checklist to review an asset and its unfinished checks before your own publishing process. These planners organize work; they do not write or publish posts.
Each free planner has its own device save and JSON backup. Its records do not automatically sync with, or import into, the paid application. The free worksheet remains available without a purchase.